GitHub Install
From webCoRE Wiki - Web-enabled Community's own Rule Engine
Summary
These instructions will help you install webCoRE via GitHub integration.
Installing Source Code into SmartThings Cloud
- Login to the SmartThings web UI.
- Click on My SmartApps.
- Click the Settings button at the top of the page.
- Click the Add new repository link at the bottom of the pop up.
- Enter "ady624" in the Owner column.
- Enter "webCoRE" in the Name column.
- Enter "master" in the Branch column.
- Click Save.
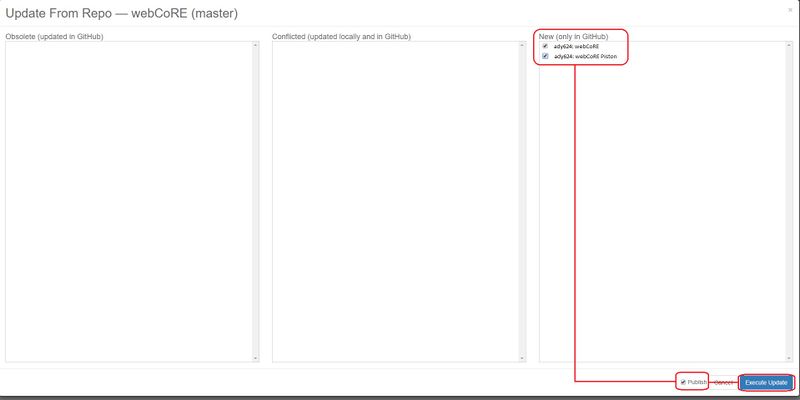
- Click Update From Repo.
- Select webCoRE (master) from the list.
- Check both "webCore.groovy" and "webCore Piston.groovy" from the New (only in GitHub) box.
- Check the Publish checkbox at the bottom of the pop up.
- Click the Execute Update button.
Note: The webCoRE source code has only been copied to your SmartThings cloud account. You must continue to the next step of Enable webCoRE OAuth.


