webCoRE
Contents
- 1 General
- 2 Definitions
- 3 Getting started
- 4 Installing webCoRE
- 5 Updating webCoRE
- 6 Troubleshooting
- 7 Creating your first piston
- 8 Sample Pistons
- 9 Understanding the basics
- 10 Anatomy of a webCoRE Piston
- 11 Misc Pages
General
The web Community's own Rule Engine (or for short, webCoRE) is a general rule engine for SmartThings. It works by allowing users to create scripts that are interpreted and executed by the SmartThings SmartApp, allowing for complex decisions. webCoRE is currently a work in progress. webCoRE reached the first Beta milestone on April 29, 2017.
Currently webCoRE is in the Second Beta milestone as of June 7th, 2017. Lots of bugs have been squashed and several new features have been implemented.
Please review the webCoRE todo list for a loose road map.
Definitions
- Piston: These are your rules inside of webCoRE.
- Instance: Each installation of webCoRE is considered a seperate instance. You may have only 1 or several.
- Variable: A container of information that is local to a piston.
- Global Variable: A container of information that is accessible by all pistons in the same instance.
- Super Global Variable: A container of information that is accessible across locations.
- Location: SmartThings hubs are considered a location.
- Dashboard (beta): Currently does nothing besides display your devices all in one page.
- Fuel Stream (beta): Displays logged data in pretty graphs.
- Blank Piston: Create a new piston from scratch.
- Duplicate Piston: Create a carbon copy of another piston from any of your instances.
- Template Piston: There is currently no templates, so this method has yet to be implemented.
- Restore Piston: Allows you to import a piston from other users backup bin code.
- Import Piston: Allows you to import a backup of your pistons.
- Backup Bin Code: This is an alphanumeric code that can be used to import pistons from other users.
Getting started
A few steps need to be completed before you can use webCoRE. First, webCoRE needs to be installed in your SmartThings account, then automations need to be configured. These are called pistons and will be detailed later. So let's start by installing webCoRE, please follow the steps below.
Please be sure to read through all the instructions. If you are still getting stuck then check the troubleshooting sections. Should you still have problems then please feel free to ask for some help on the SmartThings Forums. Be sure to find the latest webCoRE help post.
Installing webCoRE
These instructions will guide you through installing webCoRE via GitHub integration or manually all the way to adding devices and authorizing your browser for use. Be sure to follow all the steps as proper order is crucial when installing for the first time.
GitHub Installation (preferred method)
- If you are in the UK/EU, click this link link and follow the on-screen instructions to activate GitHub integration for your IDE shard.
- Login to the SmartThings IDE (US) or SmartThings IDE (EU/UK).
- Click on My SmartApps.
- Click the Settings button at the top of the page.
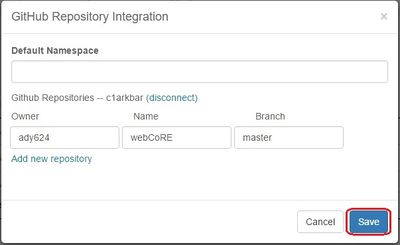
- Click the Add new repository link at the bottom of the pop up.
- Enter
ady624in the Owner column. - Enter
webCoREin the Name column. - Enter
masterin the Branch column. - Click Save (do not hit the Enter key, it will exit the form without saving).
- Click Update From Repo.
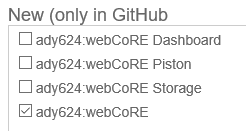
- Select webCoRE (master) from the list.
- Check "webCore.groovy" from the New (only in GitHub) box.
 Warning:
 Do not update all at once - Check the Publish checkbox at the bottom of the pop up.
- Click the Execute Update button.
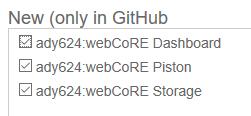
- Click again on Update From Repo.
- Select webCoRE (master) from the list.
- Check "webCoRE Piston.groovy", "webCoRE Storage.groovy"and "webCoRE Dashboard.groovy" from the New (only in GitHub) box.
- Check the Publish checkbox at the bottom of the pop up.
- Click the Execute Update button.
Manual Install
webCoRE Smart App
- Login to the SmartThings web UI.
- Click on My SmartApps.
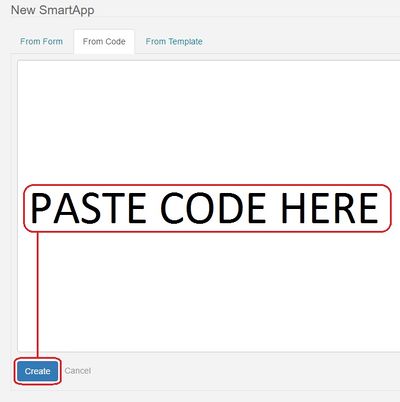
- Click the New SmartApp button.
- Select the From Code tab.
- Copy all of the code from the webCore.groovy file into the box.
- Click Create.
- Click Save.
- Click Publish.
webCoRE Piston Smart App
- Click on My SmartApps.
- Click the New SmartApp button.
- Select the From Code tab.
- Copy all of the code from the webCoRE-piston.groovy file into the box.
- Click Create.
- Click Save and wait for the loading circle to disappear.
- Click Publish and choose For Me.
webCoRE Storage Smart App
- Click on My SmartApps.
- Click the New SmartApp button.
- Select the From Code tab.
- Copy all of the code from the webCoRE-storage.groovy file into the box.
- Click Create.
- Click Save and wait for the loading circle to disappear.
- Click Publish and choose For Me.
webCoRE Dashboard Smart App
- Click on My SmartApps.
- Click the New SmartApp button.
- Select the From Code tab.
- Copy all of the code from the webCoRE-dashboard.groovy file into the box.
- Click Create.
- Click Save and wait for the loading circle to disappear.
- Click Publish and choose For Me.
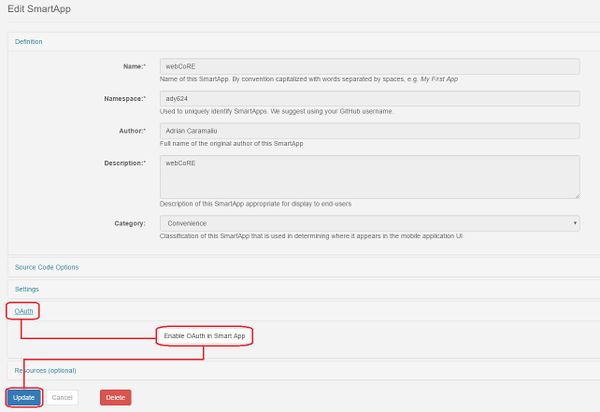
Enabling OAuth for webCoRE
- Navigate to the My SmartApps page if you are not already there.
- Click the edit button to the left of ady624 : webCoRE, it looks like a rounded square with a pencil in it.
- Scroll down and click on OAuth.
- Click the Enable OAuth in SmartApp button.
- Click the Update button at the bottom of the page.
Installing webCoRE
- Open the SmartThings app on your mobile device.
- Tap the Marketplace icon at the bottom of the screen. If you are in a Room or Device within the app you will need to go back to My Home.
- Tap the SmartApps header at the top of the page.
- Scroll down and tap My Apps.
- Scroll down until you find webCoRE and tap it. Do not tap webCoRE Piston. If you can't find webCore you likely skipped some steps above.
- Tap Next.
- Here you can change the name from webCoRE to anything you desire then tap Next. (Recommend leaving it unless you are working with multiple instances.)
- Choose a password and expiration length then tap Next.
- Scroll through the list and select all of the devices you want webCoRE to have access to. If you do not do this, you will not be able to use those devices in webCoRE. This must also be done again when adding new devices to your SmartThings Account. webCoRE will not automatically import them.
- Tap Next.
- Tap Done.
Opening the new dashboard from your phone
- From within the SmartThings app, tap the Automations icon at the bottom of the screen and select the SmartApps section.
- Scroll down and tap the name of the webCoRE instance you are trying to access. This is typically webCoRE, unless you edited the name during the installation process.
- Tap Dashboard.
- You will be prompted to enter the security password, the same password you created when you installed webCoRE.
Using webCoRE from another browser
You cannot bookmark the URL you launched from the SmartThing app. In order to use webCoRE on another device you must follow these instructions.
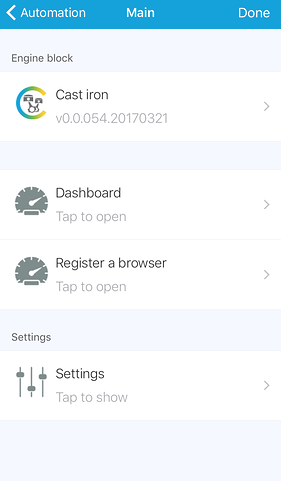
- From within the SmartThings app, tap the Automations icon at the bottom of the screen and select the SmartApps section.
- Scroll down and tap the name of the webCoRE instance you are trying to access. This is typically webCoRE, unless you edited the name during the installation process.
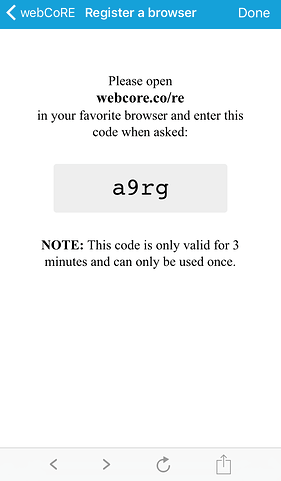
- Tap Register a browser, a page will appear providing you with a registration code. The code expires in 3 minutes and can only be used once.
- On your other device, open the browser and visit webcore.co/re
- Enter the code and click Register.
- You will be prompted to enter the security password, the same password you created when you installed webCoRE.
Updating webCoRE

When you see the alert that there is a new version available or that your smartapps are not the same version then you will need to update the webCoRE code. This has a few benefits besides being on the latest and greatest version. It is best to keep webCoRE up to date because bugs are constantly getting squashed and new features added with each version. This will make troubleshooting easier when you are running into issues and seeking help. Lastly SmartThings keeps the most used SmartApps in their cache which means quicker response times on your pistons.
For those of you with gitHub integration this is a quick and painless process. If you manually installed then it is a similar process as before. Either way updating only takes a few minutes of your time.
GitHub
- Log into the SmartThings IDE
- Select My SmartApps
- You will see all the webCoRE SmartApps listed in a purple color
- Click update from Repo
- Select webCoRE(Master)
- In the Obsolete column you will see the 4 webCoRE SmartApps
- Select all 4 checkboxes
- Click the publish checkbox
- Click Execute Update
Manual Update
This requires a little bit more work than gitHub integration but still will only take a few moments. Visit the links below and copy and paste the new raw code over the obsolete code then publish and execute update.
Update Complete
That is all you have to do. Your webCoRE instance's are now up to date. However if you have multiple locations(hubs) then you will need to do this for each location(hub).
Troubleshooting
Here are some common troubleshooting things to try if you are having issues with the following categories
Installation
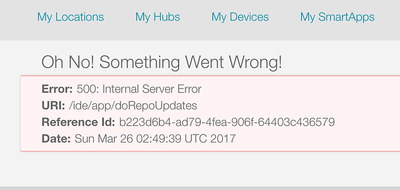
If you receive this error it may be because you installed and published both "webCore.groovy" and other SmartApps at the same time. Please do them in order per the instructions. Be sure to install/publish "webCore.groovy" first then the others after (See steps 11-16). You can do the other SmartApps at the same time after "webCore.groovy" has been installed and published.
General
Endless Spinning Square
- Open The SmartThings App
- Go into settings
- Click the map location
- Move the pin on the map around
- Position on your actual location
- save actual location
- Save the settings
Creating your first piston
Now that you have webCoRE installed and up to date, lets go ahead and walk through the steps to make a simple piston that will turn on a light switch when motion is active. From the dashboard.webcore.co main page just follow these easy steps.
- We are going to click on Add a new piston in the upper left corner of the screen
- A dialog box will open and we want to choose Create a blank piston
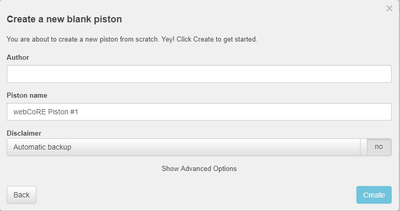
- Which will then open this dialog box
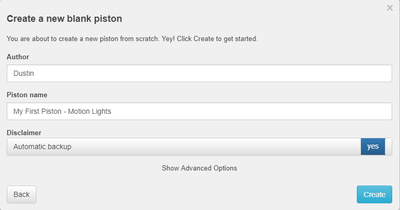
- Now simply fill in the Author (that is you!) and we will name this My First Piston - Motion Lights. We will also enable Automatic Backup by clicking on the no to change it to yes
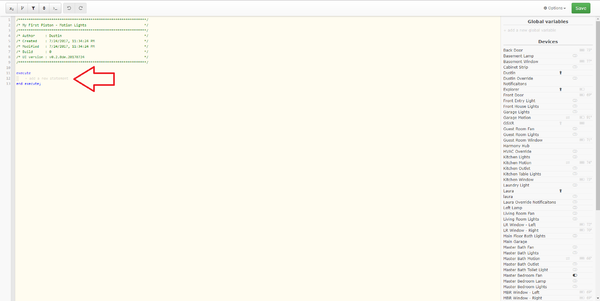
- After clicking create we are brought to the Piston Editor/Script View. Click on Add a new statement
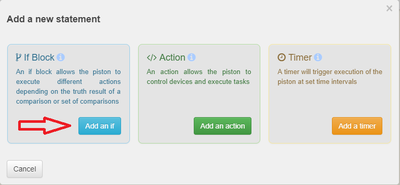
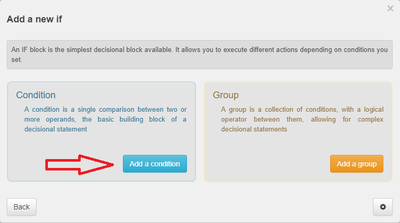
- Click on Add an if
- Click on Add a condition
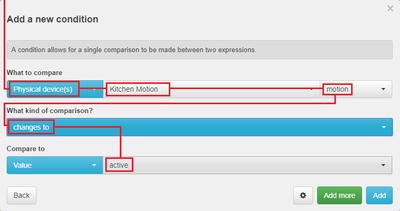
- Now we are going to select a motion sensor
- The default is Physical Device(s), now click the middle box that says Nothing Selected and choose a motion sensor then select motion as the attribute
- For the comparison select changes to under the Triggers category
- Finally select active if not already selected and click Add
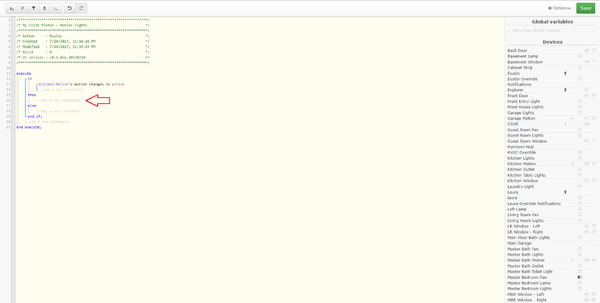
- Now that we have our trigger, lets add an action by clicking on Add a new statement below the then
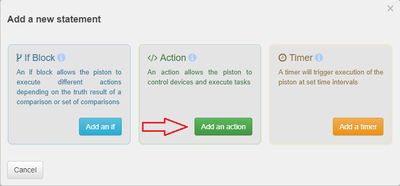
- This time we want to do something so select Add an action
- Here you can search for the device to limit the drop down or scroll down to find it. Select the Switch/bulb you want to control
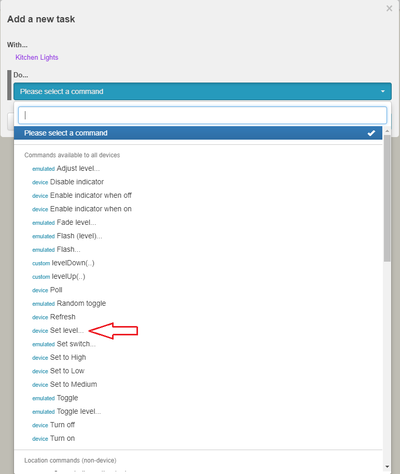
- Now we are going to select the command we want to use. Find Set Level... in the list and choose it.
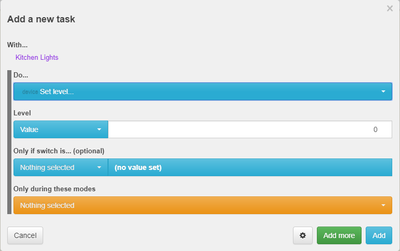
- Before we add this task we want to set the level to 100 then click add
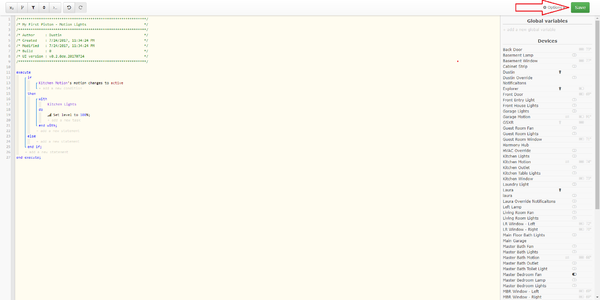
- We have our simple motion lights piston all set up. Go ahead and finalize it by clicking save in the upper right corner.
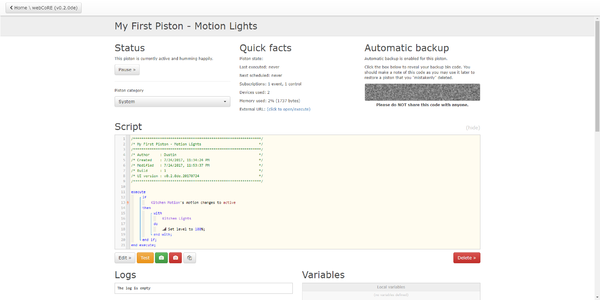
- This brings us to the overview page. This shows a vast amount of information about this individual piston.
All that is left to do now is test your piston by walking past your motion sensor. Your light should turn on to 100% brightness. However due to the simplicity of this example there is no control to turn it off. But this was just a simple overview of creating a piston. Hope this helps get you started!
Sample Pistons
This section has some user contributed sample pistons. You can import any of these pistons using the import code displayed at the top of the piston.
Understanding the basics
webCoRE is comprised of the three main components listed below.
The webCoRE child SmartApp (webCoRE Piston)
The webCoRE child SmartApp is also known as a piston. It is responsible for executing the automation script that the user creates and does the heavy lifting in the whole webCoRE ecosystem. It is directly managed by the webCoRE parent SmartApp, which can create, maintain, and delete a Piston.
The webCoRE parent SmartApp (webCoRE)
The wabCoRE parent SmartApp is the component responsible for managing the child SmartApp instances and their relationship with the Dashboard. It is the middle man that allows adding new Pistons, maintaining them, or deleting them. It is also responsible with the security of the whole ecosystem, allowing password secured access from the Dashboard.
The dashboard
The Dashboard is an HTML interface for webCoRE that allows users to manage their webCoRE installation. It is the central hub to controlling webCoRE, allowing the user to create, modify, test, and delete Pistons.
Anatomy of a webCoRE Piston
- Main article Piston
A piston is a script that contains a collection of elements, arranged so that the logic and flow of the piston perform tasks in a desired sequence. It is broken down into several sections, each having its own important role.
//todo: most details below need to be moved into the main article
The settings section
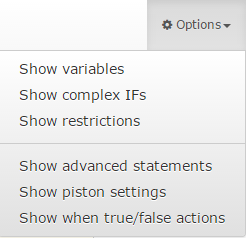
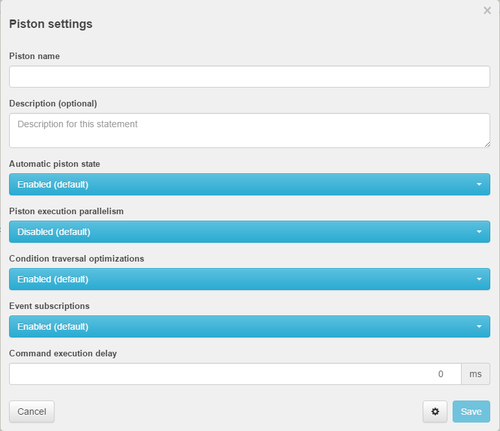
This menu is accessed from the piston editor. In the upper right hand corner select options and then enable Show piston settings
These settings allows configuration of how certain aspects of the piston function.
- Name - Change the name of a piston.
- Description - Give a description of what the piston does.
- Automatic piston state - Change whether the piston handles it state or make it manual and you can control the piston's state.
- Piston execution parallelism - //todo
- Condition traversal optimizations - //todo
- Event subscriptions - Allow event subscriptions or turn them off if you would like to make the piston a follow up style piston. If you disable this then you must have some other means for the piston to be fired.
- Command execution delay - A delay in milliseconds for commands to be executed piston wide.
The define section
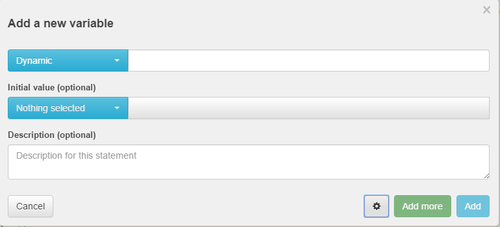
This menu is accessed from the piston editor. In the upper right hand corner select options and then enable Show variables
A very powerful feature of webCoRE is the ability to use variables. Think of variables as temporary pockets where you can store information and are able to later retrieve and use this information for any purpose. This information can be used either during the current piston run, or at a later time, when another event occurs.
- Type - You can select from the different Variable Data Types for you variable.
- Name - This is the empty box next to the type. Enter a name for your variable.
- Initial value - This is defaulted to
Nothing selected. If you decide to give it an initial value then that value will be used at each piston run regardless of what is stored in later piston runs. - Description - Give a description of what the variable is used for.
The execute section
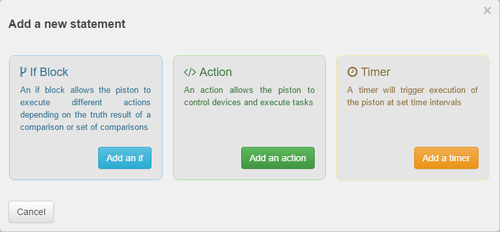
This section describes the piston's logic flow. This is the starting point of most executions. Whenever a device event happens, the piston starts its execution here. To get started click on Add a new statement
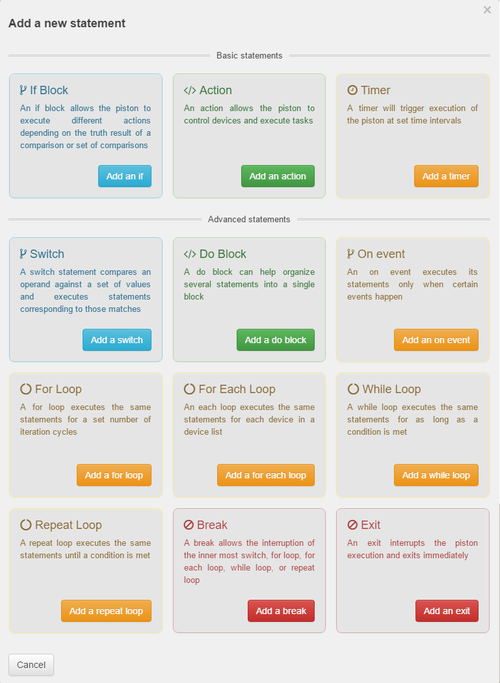
These are you 3 basic building blocks with their description listed below them. There are several more options to choose from aside from these three. In order to gain access to these you will again have to visit that trusty options menu in the top right hand corner and select Show advanced statments
After you do this and you click on Add a new statement you will now have access to all the available statement options.


