Difference between revisions of "Manual Install"
From webCoRE Wiki - Web-enabled Community's own Rule Engine
m |
|||
| (4 intermediate revisions by the same user not shown) | |||
| Line 1: | Line 1: | ||
=Summary= | =Summary= | ||
These instructions will help you manually install webCoRE. It is recommended to do [[GitHub Install]], however these steps will also work. | These instructions will help you manually install webCoRE. It is recommended to do [[GitHub Install]], however these steps will also work. | ||
| + | |||
| + | {{Warning |Edit August 2020: The new SmartThings app has [[New_SmartThings_App|different installation steps]].}} | ||
=Installing Source Code into SmartThings Cloud= | =Installing Source Code into SmartThings Cloud= | ||
| Line 8: | Line 10: | ||
== webCoRE Smart App == | == webCoRE Smart App == | ||
| − | # Login to the [http://developer.smartthings.com | + | # Login to the [https://account.smartthings.com/ SmartThings IDE]. (old link: [http://developer.smartthings.com here]). |
# Click on '''My SmartApps'''. | # Click on '''My SmartApps'''. | ||
#:[[File:Mysmartapps.jpg]] | #:[[File:Mysmartapps.jpg]] | ||
Latest revision as of 23:55, 17 August 2020
Contents
Summary
These instructions will help you manually install webCoRE. It is recommended to do GitHub Install, however these steps will also work.
| Edit August 2020: The new SmartThings app has different installation steps. |
Installing Source Code into SmartThings Cloud
You must create both the webCoRE and webCoRE Piston smart apps. Follow all the steps below!
webCoRE Smart App
- Login to the SmartThings IDE. (old link: here).
- Click on My SmartApps.
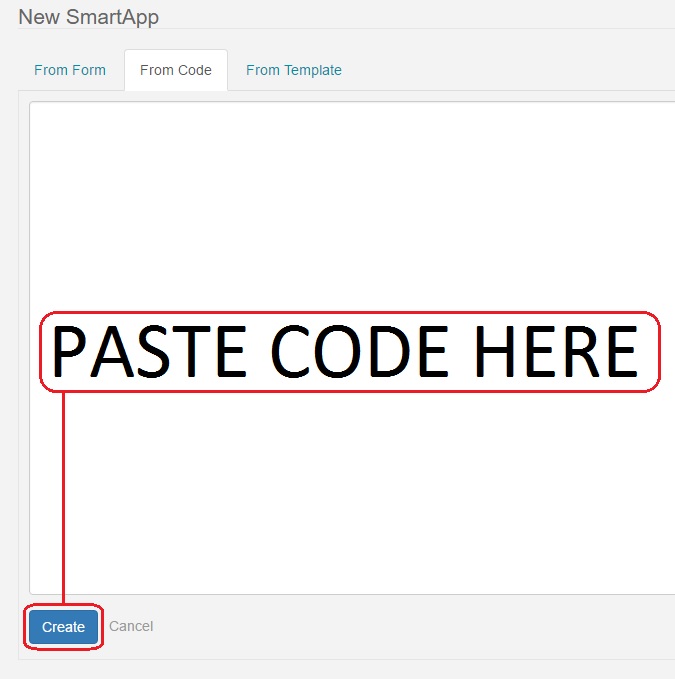
- Click the New SmartApp button.
- Select the From Code tab.
- Copy all of the code from the webCore.groovy file into the box.
- Click Create.
- Click Save.
- Click Publish.
webCoRE Piston Smart App
- Click on My SmartApps.
- Click the New SmartApp button.
- Select the From Code tab.
- Copy all of the code from the webCoRE-piston.groovy file into the box.
- Click Create.
- Click Save and wait for the loading circle to disappear.
- Click Publish and choose For Me.
webCoRE Storage Smart App
- Click on My SmartApps.
- Click the New SmartApp button.
- Select the From Code tab.
- Copy all of the code from the webCoRE-storage.groovy file into the box.
- Click Create.
- Click Save and wait for the loading circle to disappear.
- Click Publish and choose For Me.
webCoRE Dashboard Smart App
- Click on My SmartApps.
- Click the New SmartApp button.
- Select the From Code tab.
- Copy all of the code from the webCoRE-dashboard.groovy file into the box.
- Click Create.
- Click Save and wait for the loading circle to disappear.
- Click Publish and choose For Me.
Note: The webCoRE source code has only been copied to your SmartThings cloud account. You must continue to the next step of Enable webCoRE OAuth.


