Device Tiles
This page contains a list of piston tile examples that will monitor your devices connected to the Smartthings platform called Device Tiles. Please post on the Device Status Tiles page within the Community site if you want to add anything on this page, have any problems or any suggestions when using these pistons below.
It's highly recommended to create another instance of webCoRE just for the device tiles listed below since it’ll split up the memory usage within webCoRE and increase performance. Instructions on how to create multiple instances of webCoRE is located here: Multiple Instances
Contents
- 1 Presence Sensor Status Tiles
- 2 Room Occupancy Status Tiles
- 3 Thermostat Status Tiles
- 4 Door Lock Status Tiles Piston
- 5 Door Status Tiles
- 6 Doorbell Status Tiles
- 7 Window Status Tiles
- 8 Light Bulb Status Tiles
- 9 Light Switch Status Tiles
- 10 Power Switch Status Tiles
- 11 Motion Sensor Status Tiles
- 12 Temperature\Humidity Status Tiles
- 13 Battery Status Tiles
- 14 Light Sensor Status Tiles
- 15 Water Leak Sensor Status Tiles
- 16 Smoke/CO Detector Status Tiles
- 17 Sleep Sensor Status Tiles
Presence Sensor Status Tiles
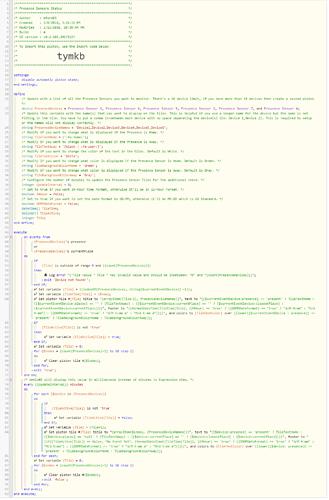
These tiles will monitor any Presence sensors you use along with displaying your location or closest location if away from home when using the webCoRE Presence Sensor. Another version of the Presence Sensor Status Tiles is also located on the Samples Page.
Import Code:
tymkb
Example of what it looks like on the Dashboard:
Before importing this one, read the instructions below:
- There’s a 16 device limit per piston so only use 16 devices max per piston. If you have more than 16 devices, create multiple pistons to get around the 16 device limit.
- Under the variables section on the top, update the device variable called PresenceDevices with the Presence Devices you want to monitor.
- Under the variables section on the top, update the string variable called PresenceDeviceNames with the Presence Devices that you want to display on the tile. This is helpful if you use a longer name for the device but the name is not fitting in the tile. You must put a comma in-between each device with no space separating the devices (Ex: Presence Device 1, Presence Device 2). This is required to setup or the names will not display correctly.
- The tiles will update either once there's an event or after first 8 minutes of the piston being created. If there's no event, it'll display "No Event Yet" instead of a time stamp in the footer. I fixed it so it will display on the 8 minute timer but this 8 minute timer can always be updated if needed as well on the UpdateInterval variable.
- The Timestamps on the footer default to US format. If you want 24-hour timestamps, update the 24Hour variable to true. For DD/MM date format, change the DDMMDateFormat variable to true. It'll work fine if you mix or enable both as well.
- How the tiles are displayed and what colors are used can be modified in the variables section, read the instructions already noted above each variable. You can use Font Awesome or Emojis for images in the tiles to change how they are displayed or change the color schemes to your liking.
Room Occupancy Status Tiles
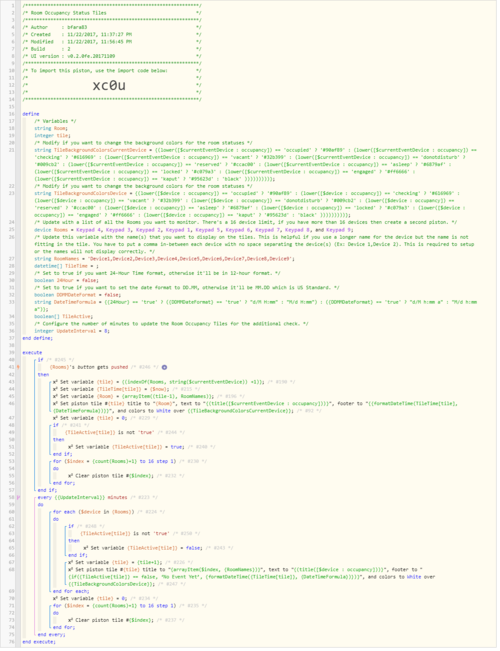
This piston is designed for the Rooms Manager Smartapp and Rooms Occupancy DTH located here: Rooms Manager smartapps and Rooms Occupancy DTH, give credit to Baz2473 and bangali for this great idea! These tiles will monitor any Room sensors you use with the current occupancy status.
Import Code:
xc0u
Example of what it looks like on the Dashboard:
Before importing this one, read the instructions below:
- There’s a 16 device limit per piston so only use 16 devices max per piston. If you have more than 16 devices, create multiple pistons to get around the 16 device limit.
- Under the variables section on the top, update the device variable called Rooms with the Room Devices you want to monitor.
- Under the variables section on the top, update the string variable called RoomNames with the Room Devices that you want to display on the tile. This is helpful if you use a longer name for the device but the name is not fitting in the tile. You must put a comma in-between each device with no space separating the devices (Ex: Device 1,Device 2). This is required to setup or the names will not display correctly.
- The tiles will update either once there's an event or after first 8 minutes of the piston being created. If there's no event, it'll display "No Event Yet" instead of a time stamp in the footer. I fixed it so it will display on the 8 minute timer but this 8 minute timer can always be updated if needed as well on the UpdateInterval variable.
- The Timestamps on the footer default to US format. If you want 24-hour timestamps, update the 24Hour variable to true. For DD/MM date format, change the DDMMDateFormat variable to true. It'll work fine if you mix or enable both as well.
- How the tiles are displayed and what colors are used can be modified in the variables section, read the instructions already noted above each variable. You can use Font Awesome or Emojis for images in the tiles to change how they are displayed or change the color schemes to your liking.
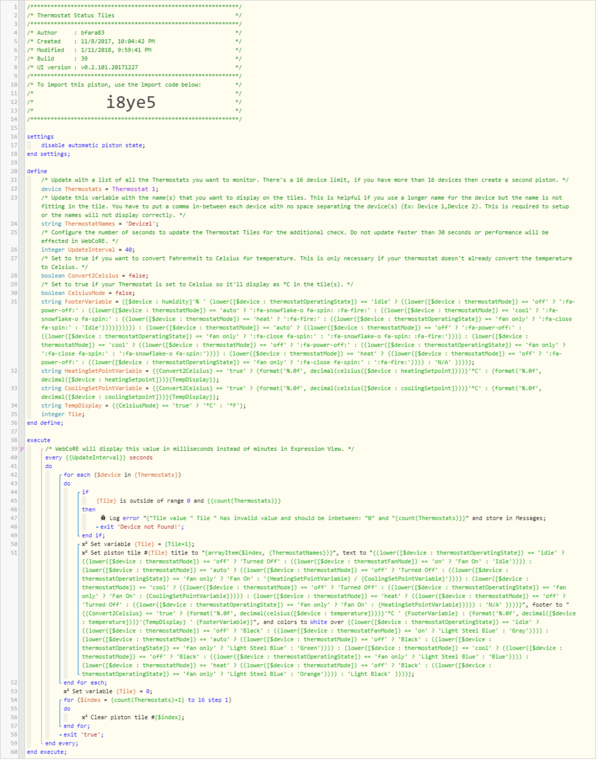
Thermostat Status Tiles
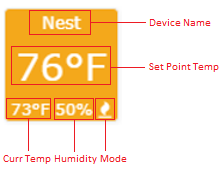
These tiles will monitor any Thermostats setup with the setpoint temperature, current temperature, humidity and current mode
Import Code:
i8ye5
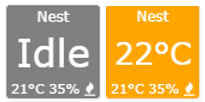
Example of what it looks like on the Dashboard. Below is all the different ways it’ll show based on the mode the Thermostat is in. Gray: Idle / Orange: Heating / Blue: Cooling / Green: Auto (Heat & Cool) / Light Steel Blue: Fan Only / Black: Off (not on at all, not even idle)
When Celsius Variable is enabled, examples of what the tiles look like below:
Below shows a definition of all the values within the Thermostat tile(s):
Before importing this one, read the instructions below:
- This piston was designed for all Thermostats, but I only have a Nest Thermostat to test with so please let me know how this works with other Thermostat brands.
- There’s a 16-device limit per piston so only use 16 devices max per piston. If you have more than 16 devices, create multiple pistons to get around the 16-device limit.
- Under the variables section on the top, update the device variable called Thermostats with the Thermostats you want to monitor.
- Under the variables section on the top, update the string variable called ThermostatNames with the names that you want to display on the tile. This is helpful if you use a longer name for the device but the name is not fitting in the tile. You must put a comma in-between each device with no space separating the devices (Ex: Device 1,Device 2). This is required to set up or the names will not display correctly.
- Under the variables section on the top, if your Thermostat does not support converting the temperature to Celsius in the DTH, change the Variable called Convert2Celsius to True so it’ll convert from F to C.
- Under the variables section on the top, if your Thermostat is set to Celsius, change the Variable called CelsiusMode to true so it’ll display correctly as Celsius in the Device tiles.
- A timer is setup to update every 40 seconds by default, this can be modified by updating the UpdateInterval variable to the desired number of seconds you like. Do not use anything below 30 seconds though, it’ll decrease the performance a lot in WebCoRE.
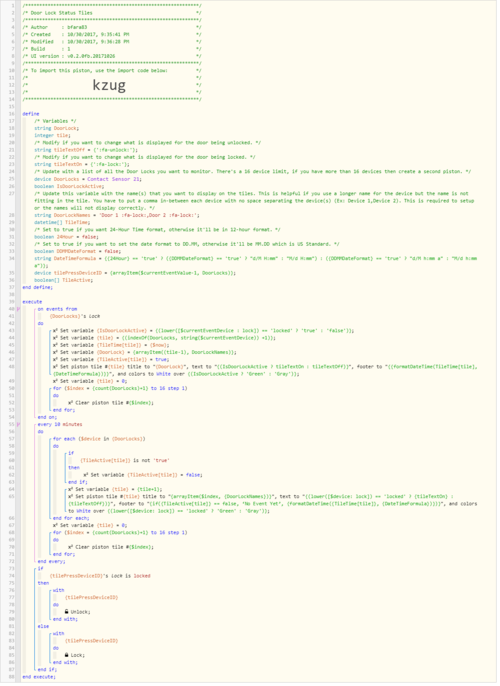
Door Lock Status Tiles Piston
These tiles will monitor any Door Locks setup and display that status (Locked or Unlocked)
Import Code:
kzug
Example of what it looks like on the Dashboard:
Before importing this one, read the instructions below:
- There’s a 16 device limit per piston so only use 16 devices max per piston. If you have more than 16 devices, create multiple pistons to get around the 16 device limit.
- Under the variables section on the top, update the device variable called DoorLocks with the Door Locks you want to monitor.
- Under the variables section on the top, update the string variable called DoorLockNames with the names that you want to display on the tile. This is helpful if you use a longer name for the device but the name is not fitting in the tile. You have to put a comma in-between each device with no space separating the devices (Ex: Device 1,Device 2). This is required to set up or the names will not display correctly.
- Clicking the tile will toggle (lock or unlock) the door lock. If you want to open the tile make sure you hold down CTRL + mouse click to open the tile instead of toggling the door lock.
- The tiles will update either once there's an event or after first 10 minutes of the piston being created. If there's no event, it'll display "No Event Yet" instead of a time stamp in the footer. I fixed it so it will display on the 10 minute timer but this 10 minute timer can always be updated if needed as well on the UpdateInterval variable.
- The Timestamps on the footer default to US format. If you want 24-hour timestamps, update the 24Hour variable to true. For DD/MM date format, change the DDMMDateFormat variable to true. It'll work fine if you mix or enable both as well.
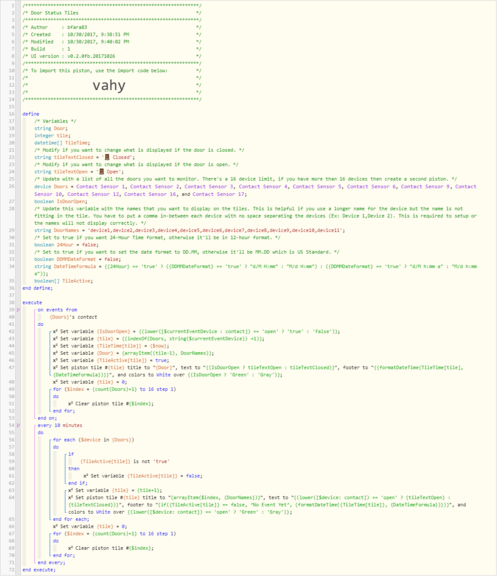
Door Status Tiles
These tiles will monitor any doors setup via contact sensors and display the status (Open or Closed)
Import Code:
vahy
Example of what it looks like on the Dashboard:
Before importing this one, read the instructions below:
- There’s a 16 device limit per piston so only use 16 devices max per piston. If you have more than 16 devices, create multiple pistons to get around the 16 device limit.
- Under the variables section on the top, update the device variable called Doors with the Door Locks you want to monitor.
- Under the variables section on the top, update the string variable called DoorNames with the names that you want to display on the tile. This is helpful if you use a longer name for the device but the name is not fitting in the tile. You have to put a comma in-between each device with no space separating the devices (Ex: Device 1,Device 2). This is required to set up or the names will not display correctly.
- The tiles will update either once there's an event or after first 10 minutes of the piston being created. If there's no event, it'll display "No Event Yet" instead of a time stamp in the footer. I fixed it so it will display on the 10 minute timer but this 10 minute timer can always be updated if needed as well on the UpdateInterval variable.
- The Timestamps on the footer default to US format. If you want 24-hour timestamps, update the 24Hour variable to true. For DD/MM date format, change the DDMMDateFormat variable to true. It'll work fine if you mix or enable both as well.
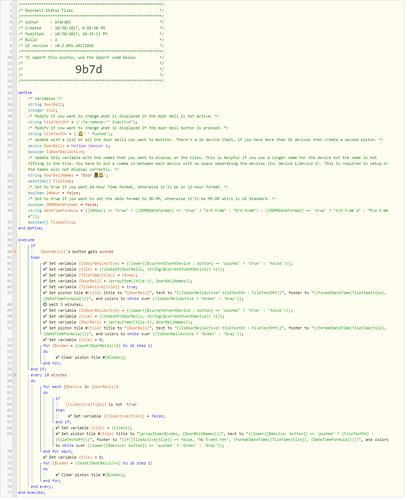
Doorbell Status Tiles
These tiles will monitor any doorbells setup and display the status (Active or Inactive)
Import Code:
9b7d
Example of what it looks like on the Dashboard:
Before importing this one, read the instructions below:
- There’s a 16 device limit per piston so only use 16 devices max per piston. If you have more than 16 devices, create multiple pistons to get around the 16 device limit.
- Under the variables section on the top, update the device variable called DoorBells with the Doorbells you want to monitor.
- Under the variables section on the top, update the string variable called DoorBellNames with the names that you want to display on the tile. This is helpful if you use a longer name for the device but the name is not fitting in the tile. You have to put a comma in-between each device with no space separating the devices (Ex: Device 1,Device 2). This is required to set up or the names will not display correctly.
- The tiles will update either once there's an event or after first 10 minutes of the piston being created. If there's no event, it'll display "No Event Yet" instead of a time stamp in the footer. I fixed it so it will display on the 10 minute timer but this 10 minute timer can always be updated if needed as well on the UpdateInterval variable.
- The Timestamps on the footer default to US format. If you want 24-hour timestamps, update the 24Hour variable to true. For DD/MM date format, change the DDMMDateFormat variable to true. It'll work fine if you mix or enable both as well.
Window Status Tiles
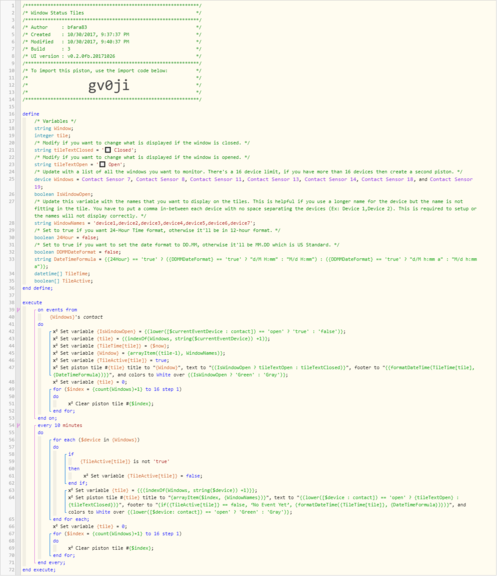
These tiles will monitor any windows with contact sensors that is setup and display the status (Opened or Closed)
Import Code:
gv0ji
Example of what it looks like on the Dashboard:
Before importing this one, read the instructions below:
- There’s a 16 device limit per piston so only use 16 devices max per piston. If you have more than 16 devices, create multiple pistons to get around the 16 device limit.
- Under the variables section on the top, update the device variable called Windows with the Windows you want to monitor.
- Under the variables section on the top, update the string variable called WindowNames with the names that you want to display on the tile. This is helpful if you use a longer name for the device but the name is not fitting in the tile. You have to put a comma in-between each device with no space separating the devices (Ex: Device 1,Device 2). This is required to set up or the names will not display correctly.
- The tiles will update either once there's an event or after first 10 minutes of the piston being created. If there's no event, it'll display "No Event Yet" instead of a time stamp in the footer. I fixed it so it will display on the 10 minute timer but this 10 minute timer can always be updated if needed as well on the UpdateInterval variable.
- The Timestamps on the footer default to US format. If you want 24-hour timestamps, update the 24Hour variable to true. For DD/MM date format, change the DDMMDateFormat variable to true. It'll work fine if you mix or enable both as well.
Light Bulb Status Tiles
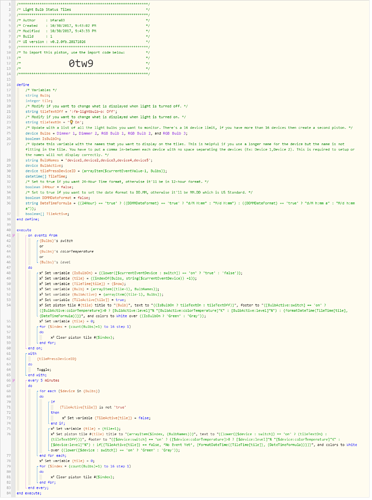
These tiles will monitor any light bulbs setup and display the status (Turned On or Off). The tiles are also setup to display the level and color temperature (if bulb supports it) if turned on.
Import Code:
0tw9
Example of what it looks like on the Dashboard:
Before importing this one, read the instructions below:
- There’s a 16 device limit per piston so only use 16 devices max per piston. If you have more than 16 devices, create multiple pistons to get around the 16 device limit.
- This Piston displays the Color Temperature and Level on the footer, it only display time stamps when the light bulb is turned off. If the bulb doesn’t support colors, it will not display the color temperature value as you can see with the LR Lamp example above that’s a white bulb.
- Under the variables section on the top, update the device variable called “Bulbs” with the light bulbs you want to monitor.
- Under the variables section on the top, update the string variable called “BulbNames” with the names that you want to display on the tile. This is helpful if you use a longer name for the device but the name is not fitting in the tile. You have to put a comma in-between each device with no space separating the devices (Ex: Device 1,Device 2). This is required to setup or the names will not display correctly.
- Clicking the tile will toggle the light bulb (Turn on or off). If you want to open the tile make sure you hold down CTRL + mouse click to open the tile instead of toggling the light bulb.
- The tiles will update either once there’s an event or after first 10 minutes of the piston being created. If there’s no event, it’ll display “No Event Yet” instead of a time stamp in the footer. I fixed it so it will display on the 10 minute timer but this 10 minute timer can always be updated if needed as well.
- The Timestamps on the footer default to US format. If you want 24-hour timestamps, update the 24Hour variable to true. For DD/MM date format, change the DDMMDateFormat variable to true It’ll work fine if you mix or enable both as well.
Light Switch Status Tiles
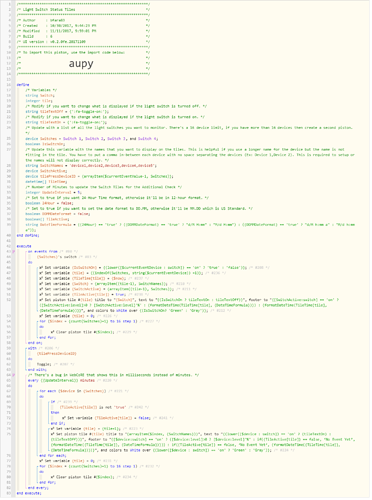
These tiles will monitor any light switches setup and display the status (Turned On or Off). The tiles are also setup to display the level (if switch supports it) if turned on.
Import Code:
aupy
Example of what it looks like on the Dashboard:
Before importing this one, read the instructions below:
- There’s a 16 device limit per piston so only use 16 devices max per piston. If you have more than 16 devices, create multiple pistons to get around the 16 device limit.
- This Piston displays the Level on the footer if the switch is a dimmer. It'll only display time stamps when the light switch is turned off or turned on if the switch doesn't support a level.
- Under the variables section on the top, update the device variable called “Switches” with the light switches you want to monitor.
- Under the variables section on the top, update the string variable called “SwitchNames” with the names that you want to display on the tile. This is helpful if you use a longer name for the device but the name is not fitting in the tile. You have to put a comma in-between each device with no space separating the devices (Ex: Device 1,Device 2). This is required to setup or the names will not display correctly.
- Clicking the tile will toggle the light switch (Turn on or off). If you want to open the tile make sure you hold down CTRL + mouse click to open the tile instead of toggling the light switch.
- The tiles will update either once there’s an event or after first 10 minutes of the piston being created. If there’s no event, it’ll display “No Event Yet” instead of a time stamp in the footer. I fixed it so it will display on the 10 minute timer but this 10 minute timer can always be updated if needed as well.
- The Timestamps on the footer default to US format. If you want 24-hour timestamps, update the 24Hour variable to true. For DD/MM date format, change the DDMMDateFormat variable to true It’ll work fine if you mix or enable both as well.
Power Switch Status Tiles
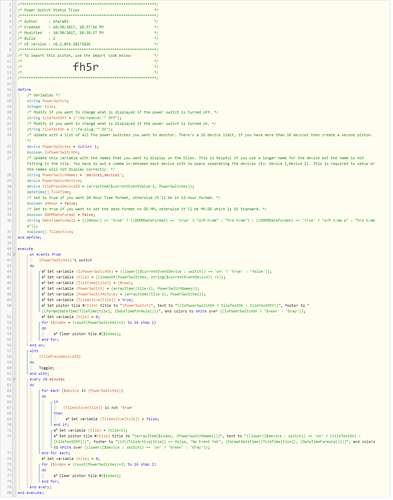
These tiles will monitor any power switches setup and display the status (Turned On or Off).
Import Code:
fh5r
Example of what it looks like on the Dashboard:
Before importing this one, read the instructions below:
- There’s a 16 device limit per piston so only use 16 devices max per piston. If you have more than 16 devices, create multiple pistons to get around the 16 device limit.
- Under the variables section on the top, update the device variable called “PowerSwitches” with the Power switches you want to monitor.
- Under the variables section on the top, update the string variable called “PowerSwitchNames” with the Power switches names that you want to display on the tile. This is helpful if you use a longer name for the device but the name is not fitting in the tile. You have to put a comma in-between each device with no space seperating the devices (Ex: Power Sw1,Power Sw2). This is required to setup or the names will not display correctly.
- Clicking the tile will toggle the device, if you want to open the tile make sure you hold down CTRL + mouse click to open the tile instead of toggling the power switch.
- The tiles will update either once there’s an event or after first 10 minutes of the piston being created. If there’s no event, it’ll display “No Event Yet” instead of a time stamp in the footer. I fixed it so it will display on the 10 minute timer but this 10 minute timer can always be updated if needed as well.
- The Timestamps on the footer default to US format. If you want 24-hour timestamps, update the 24Hour variable to true. For DD/MM date format, change the DDMMDateFormat variable to true It’ll work fine if you mix or enable both as well.
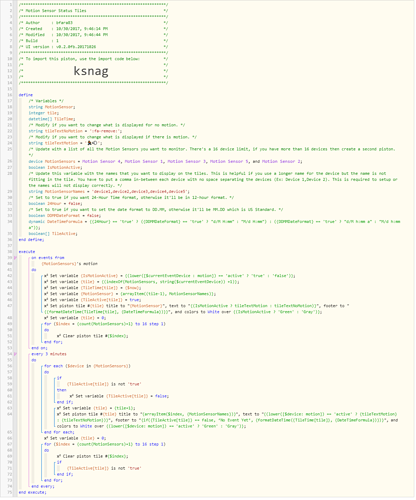
Motion Sensor Status Tiles
These tiles will monitor any motion sensors setup and display the status (Motion or No Motion).
Import Code:
ksnag
Example of what it looks like on the Dashboard:
Before importing this one, read the instructions below:
- There’s a 16 device limit per piston so only use 16 devices max per piston. If you have more than 16 devices, create multiple pistons to get around the 16 device limit.
- Under the variables section on the top, update the device variable called “MotionSensors” with the motion sensors you want to monitor.
- Under the variables section on the top, update the string variable called “MotionSensorNames” with the names that you want to display on the tile. This is helpful if you use a longer name for the device but the name is not fitting in the tile. You have to put a comma in-between each device with no space separating the devices (Ex: Device 1,Device 2). This is required to setup or the names will not display correctly.
- The tiles will update either once there’s an event or after first 10 minutes of the piston being created. If there’s no event, it’ll display “No Event Yet” instead of a time stamp in the footer. I fixed it so it will display on the 10 minute timer but this 10 minute timer can always be updated if needed as well.
- The Timestamps on the footer default to US format. If you want 24-hour timestamps, update the 24Hour variable to true. For DD/MM date format, change the DDMMDateFormat variable to true It’ll work fine if you mix or enable both as well.
Temperature\Humidity Status Tiles
To-Do
Battery Status Tiles
To-Do
Light Sensor Status Tiles
To-Do
Water Leak Sensor Status Tiles
To-Do
Smoke/CO Detector Status Tiles
To-Do
Sleep Sensor Status Tiles
To-Do


